Creating a Cloud Server
Step 1: Log In
Section titled “Step 1: Log In”Log in at fleet.hostify.in.th. New users can register using the provided link. Before creating a Cloud Server, you must have sufficient credit — a minimum of 21 days’ worth is required.
Step 2: Go to the Cloud Server Menu
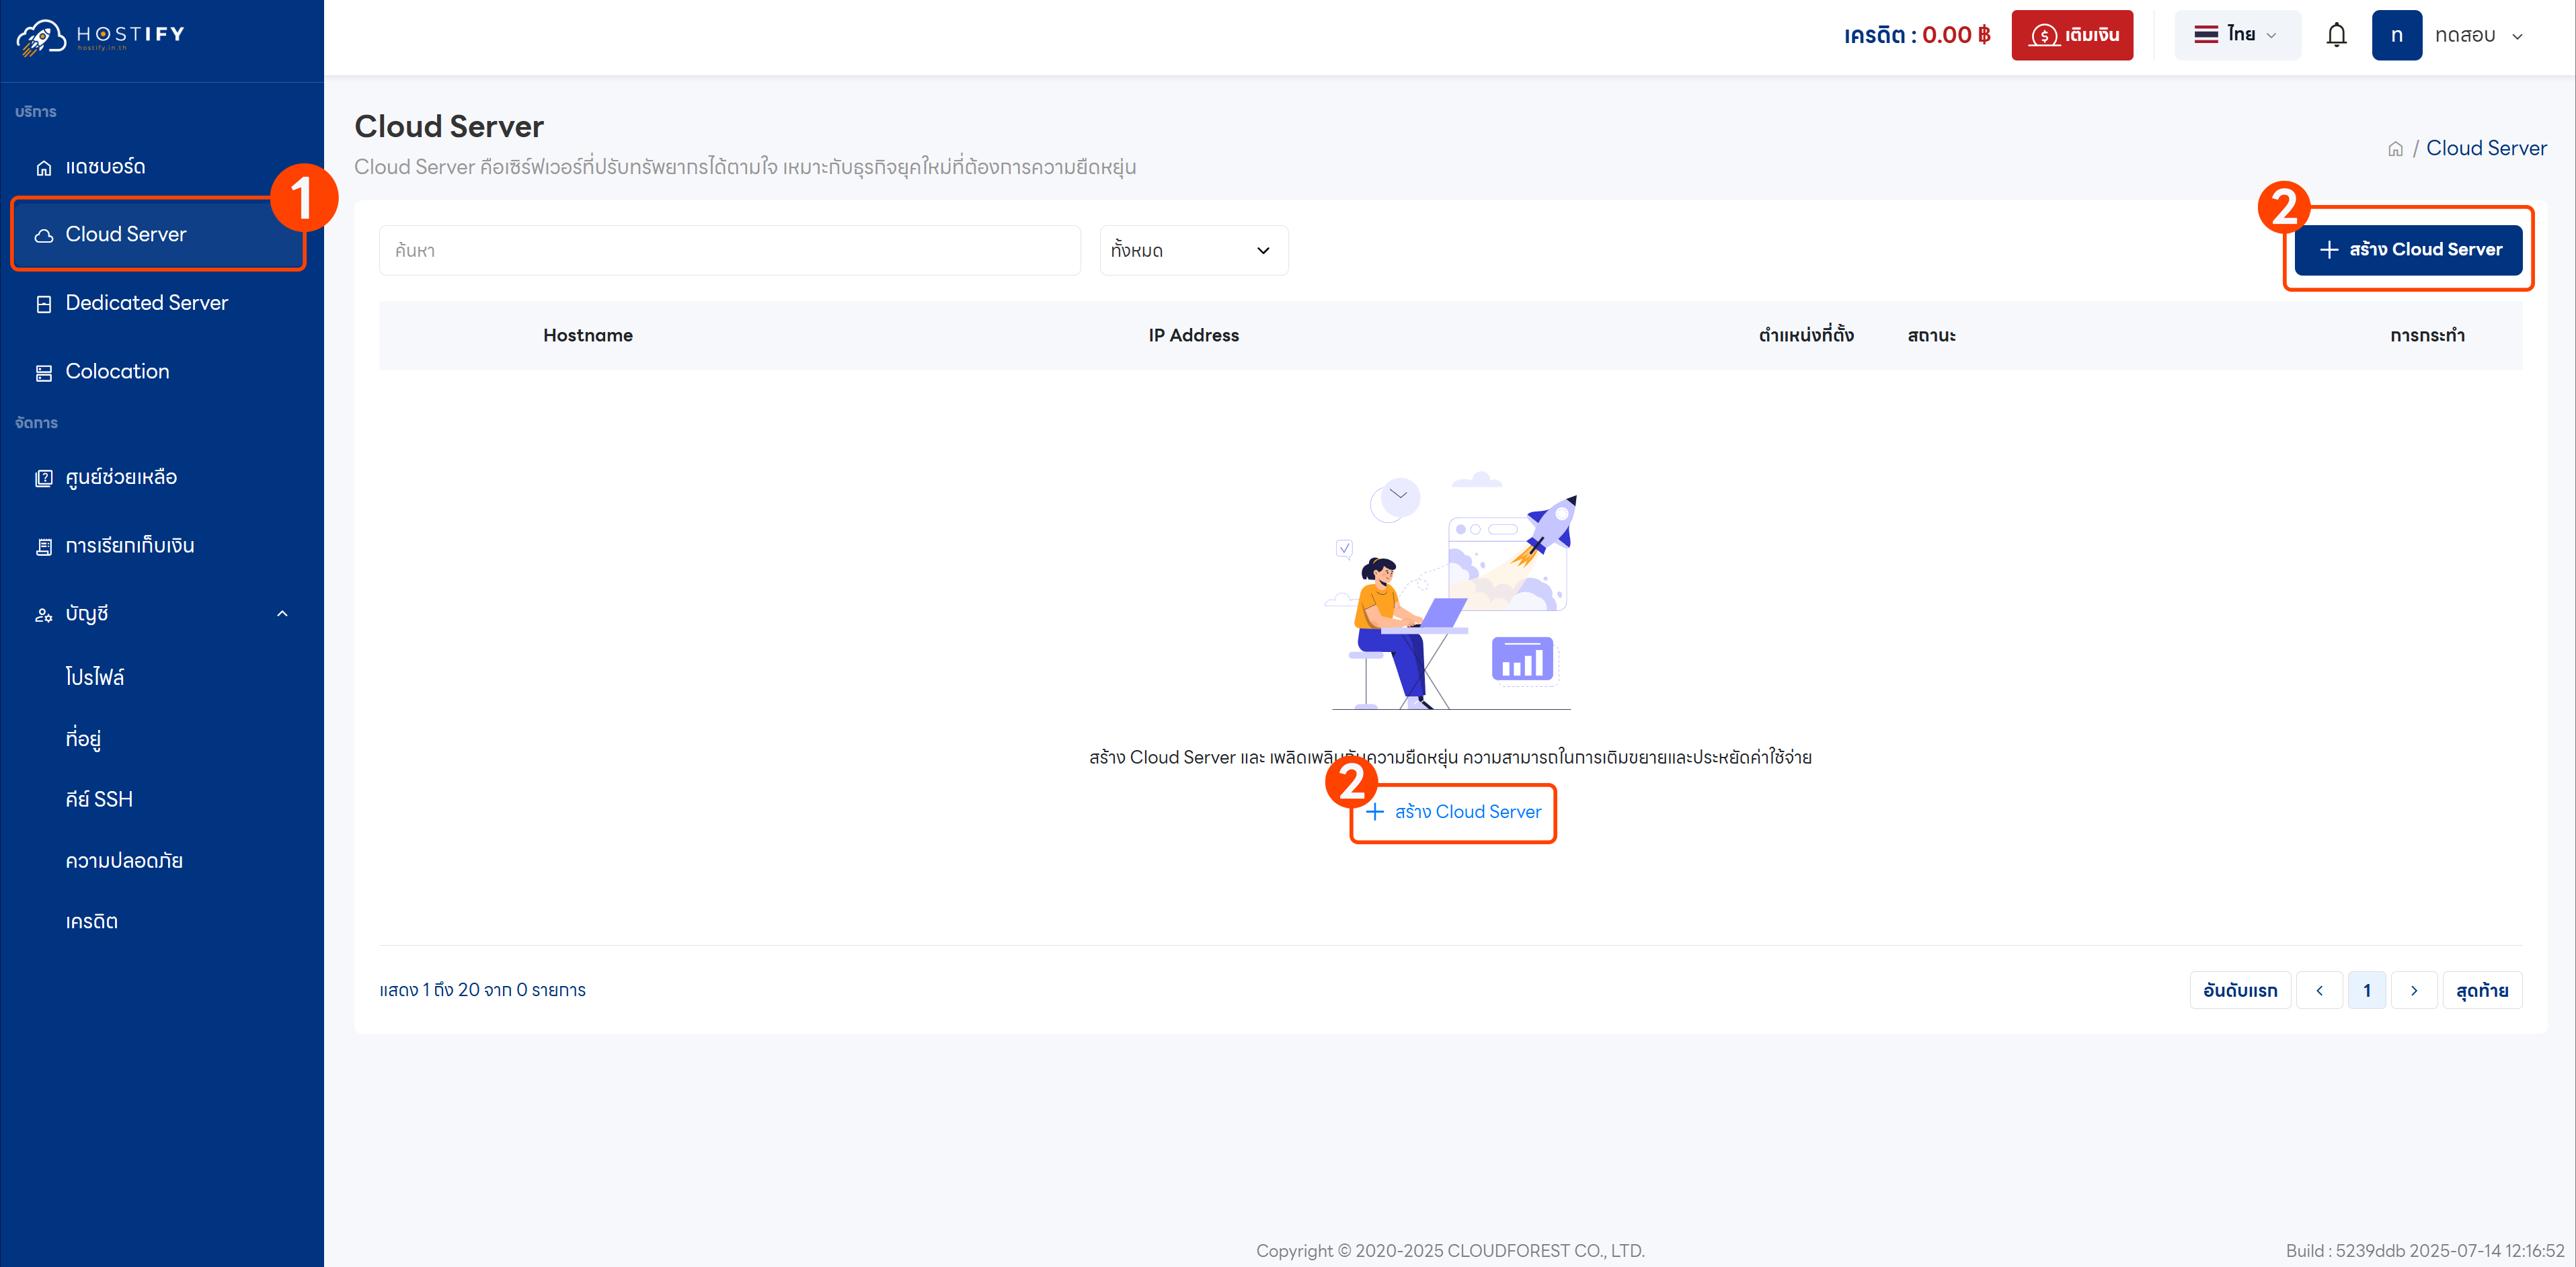
Section titled “Step 2: Go to the Cloud Server Menu”Once logged in, select “Cloud Server” then click “Create Cloud Server”.
Step 3: Configure Settings
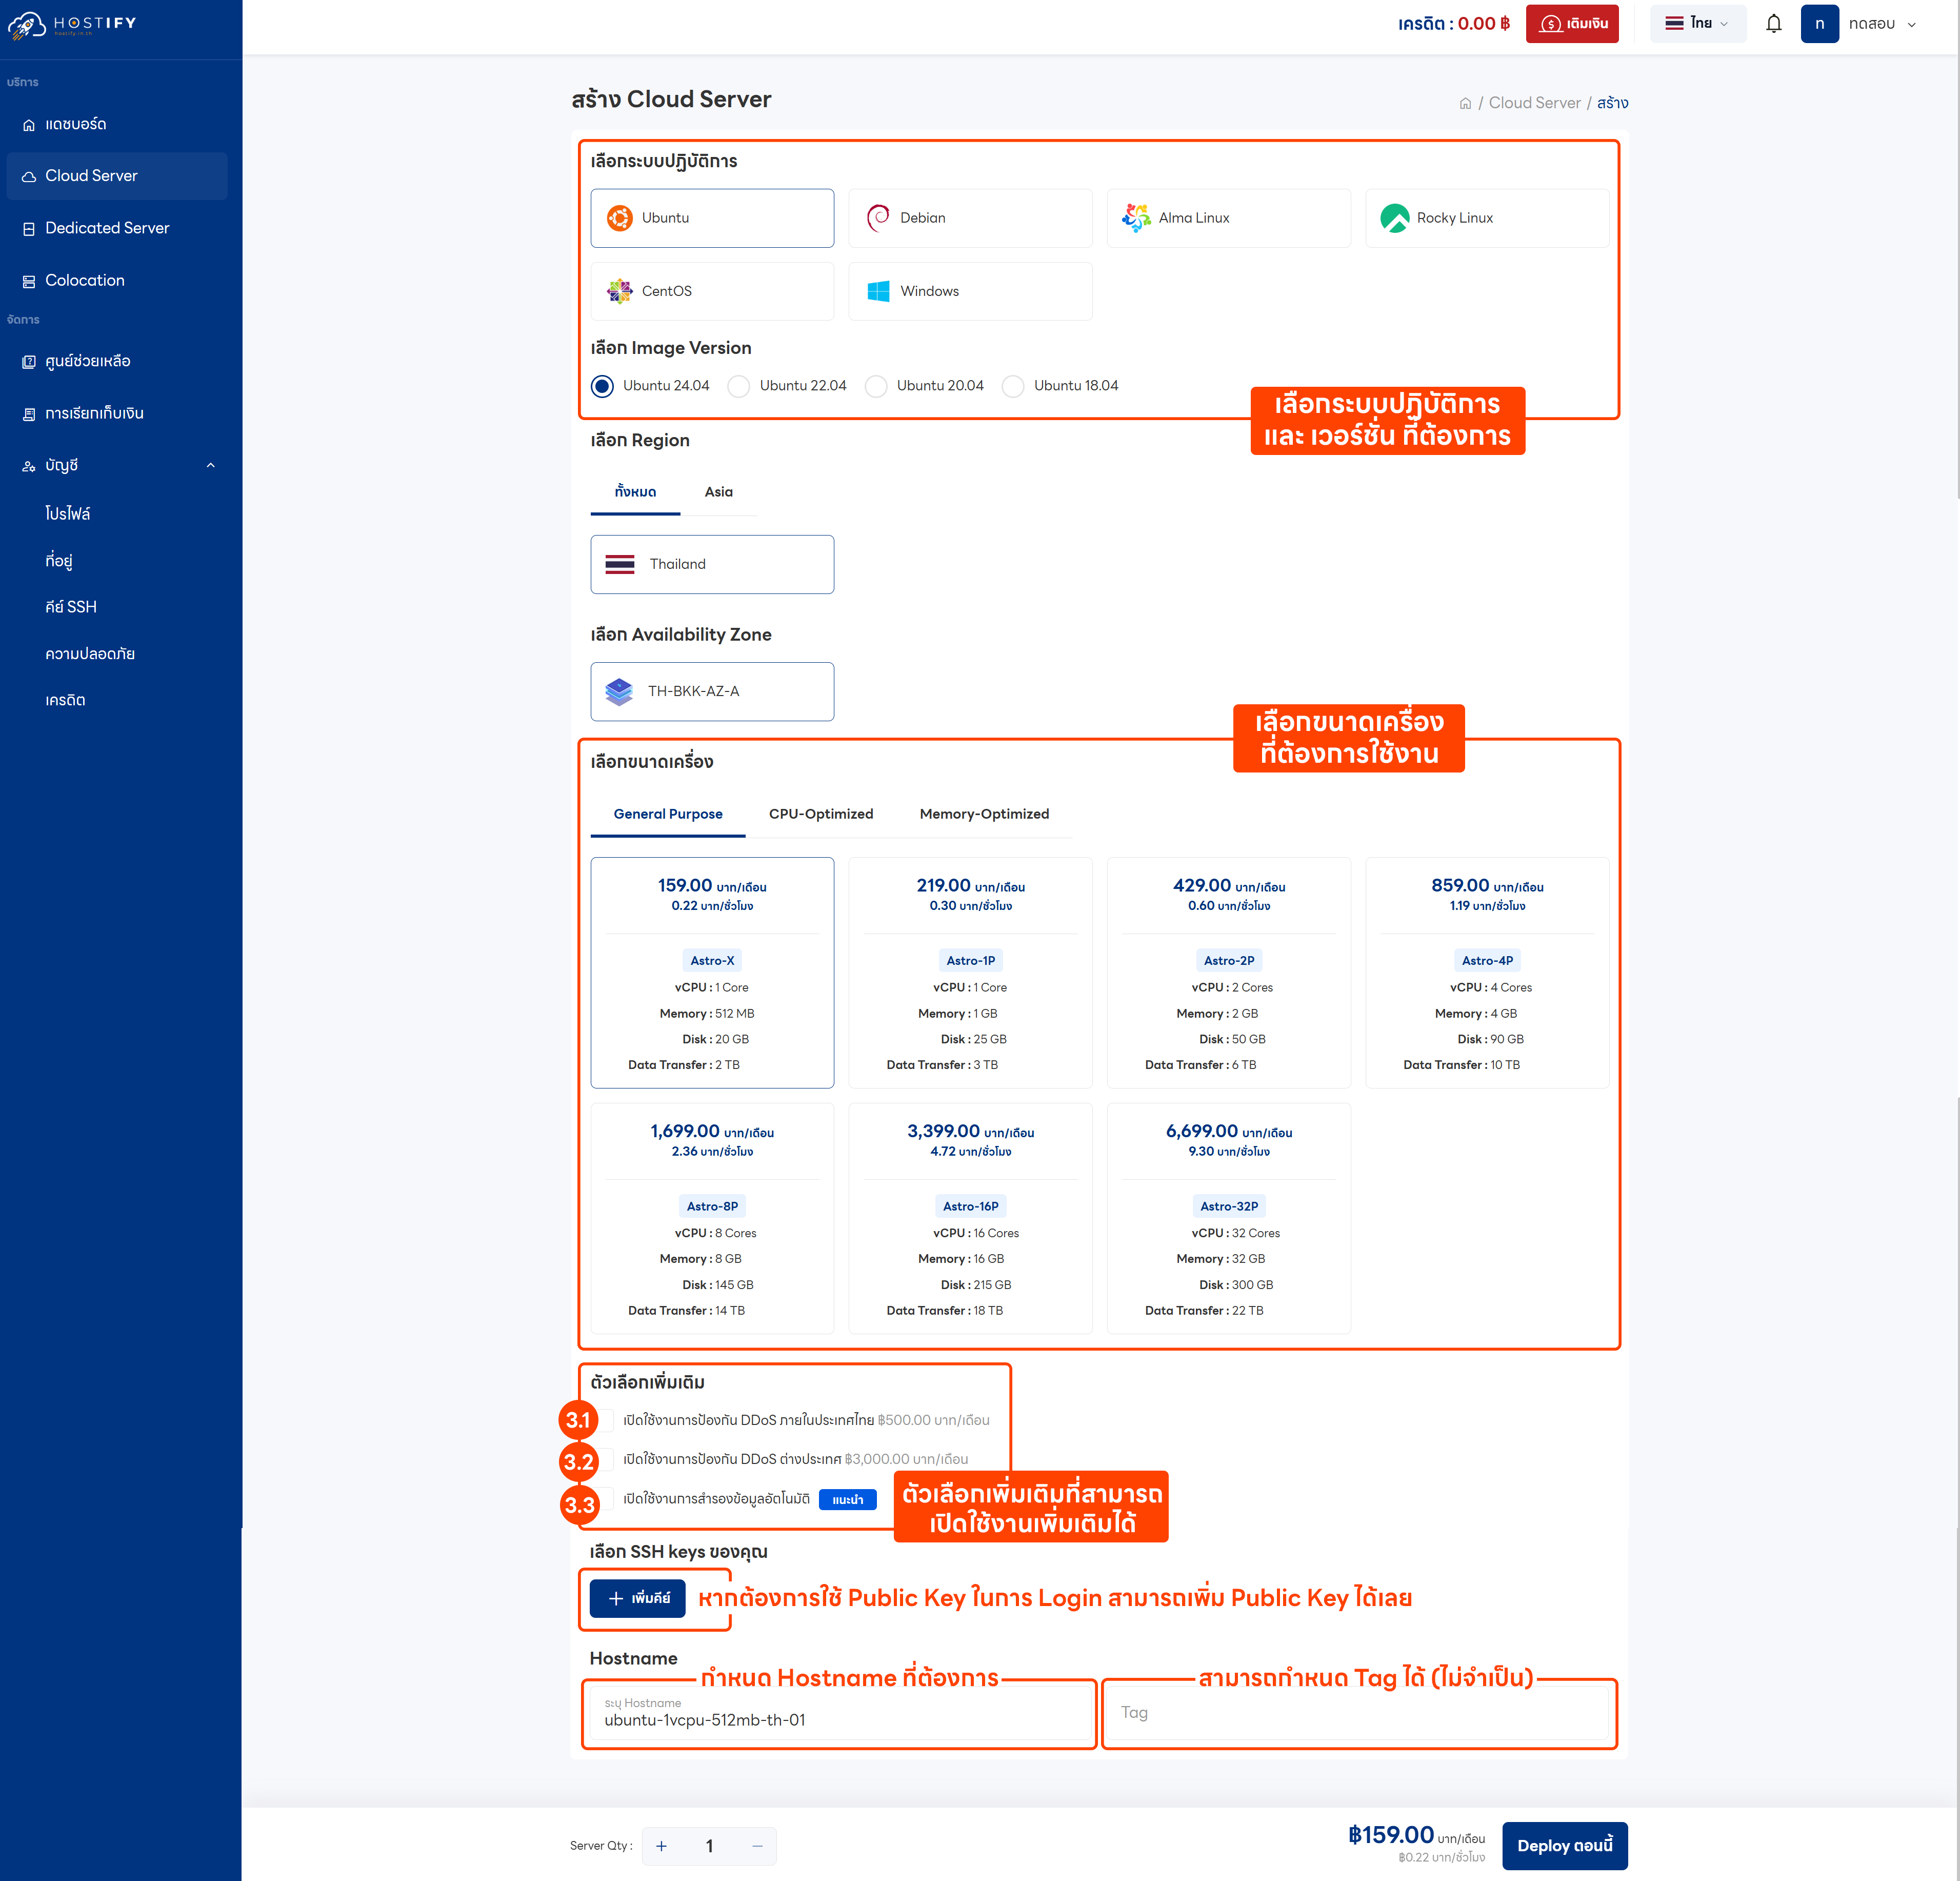
Section titled “Step 3: Configure Settings”- Select the desired Operating System and version (this example uses Ubuntu 22.04 LTS)
- Choose a server size
- Optional add-ons (additional cost):
- Domestic DDoS protection
- International DDoS protection
- Automatic backup
- Add an SSH Key if one has already been configured
- Click “Deploy Now”
Step 4: Wait for Deployment
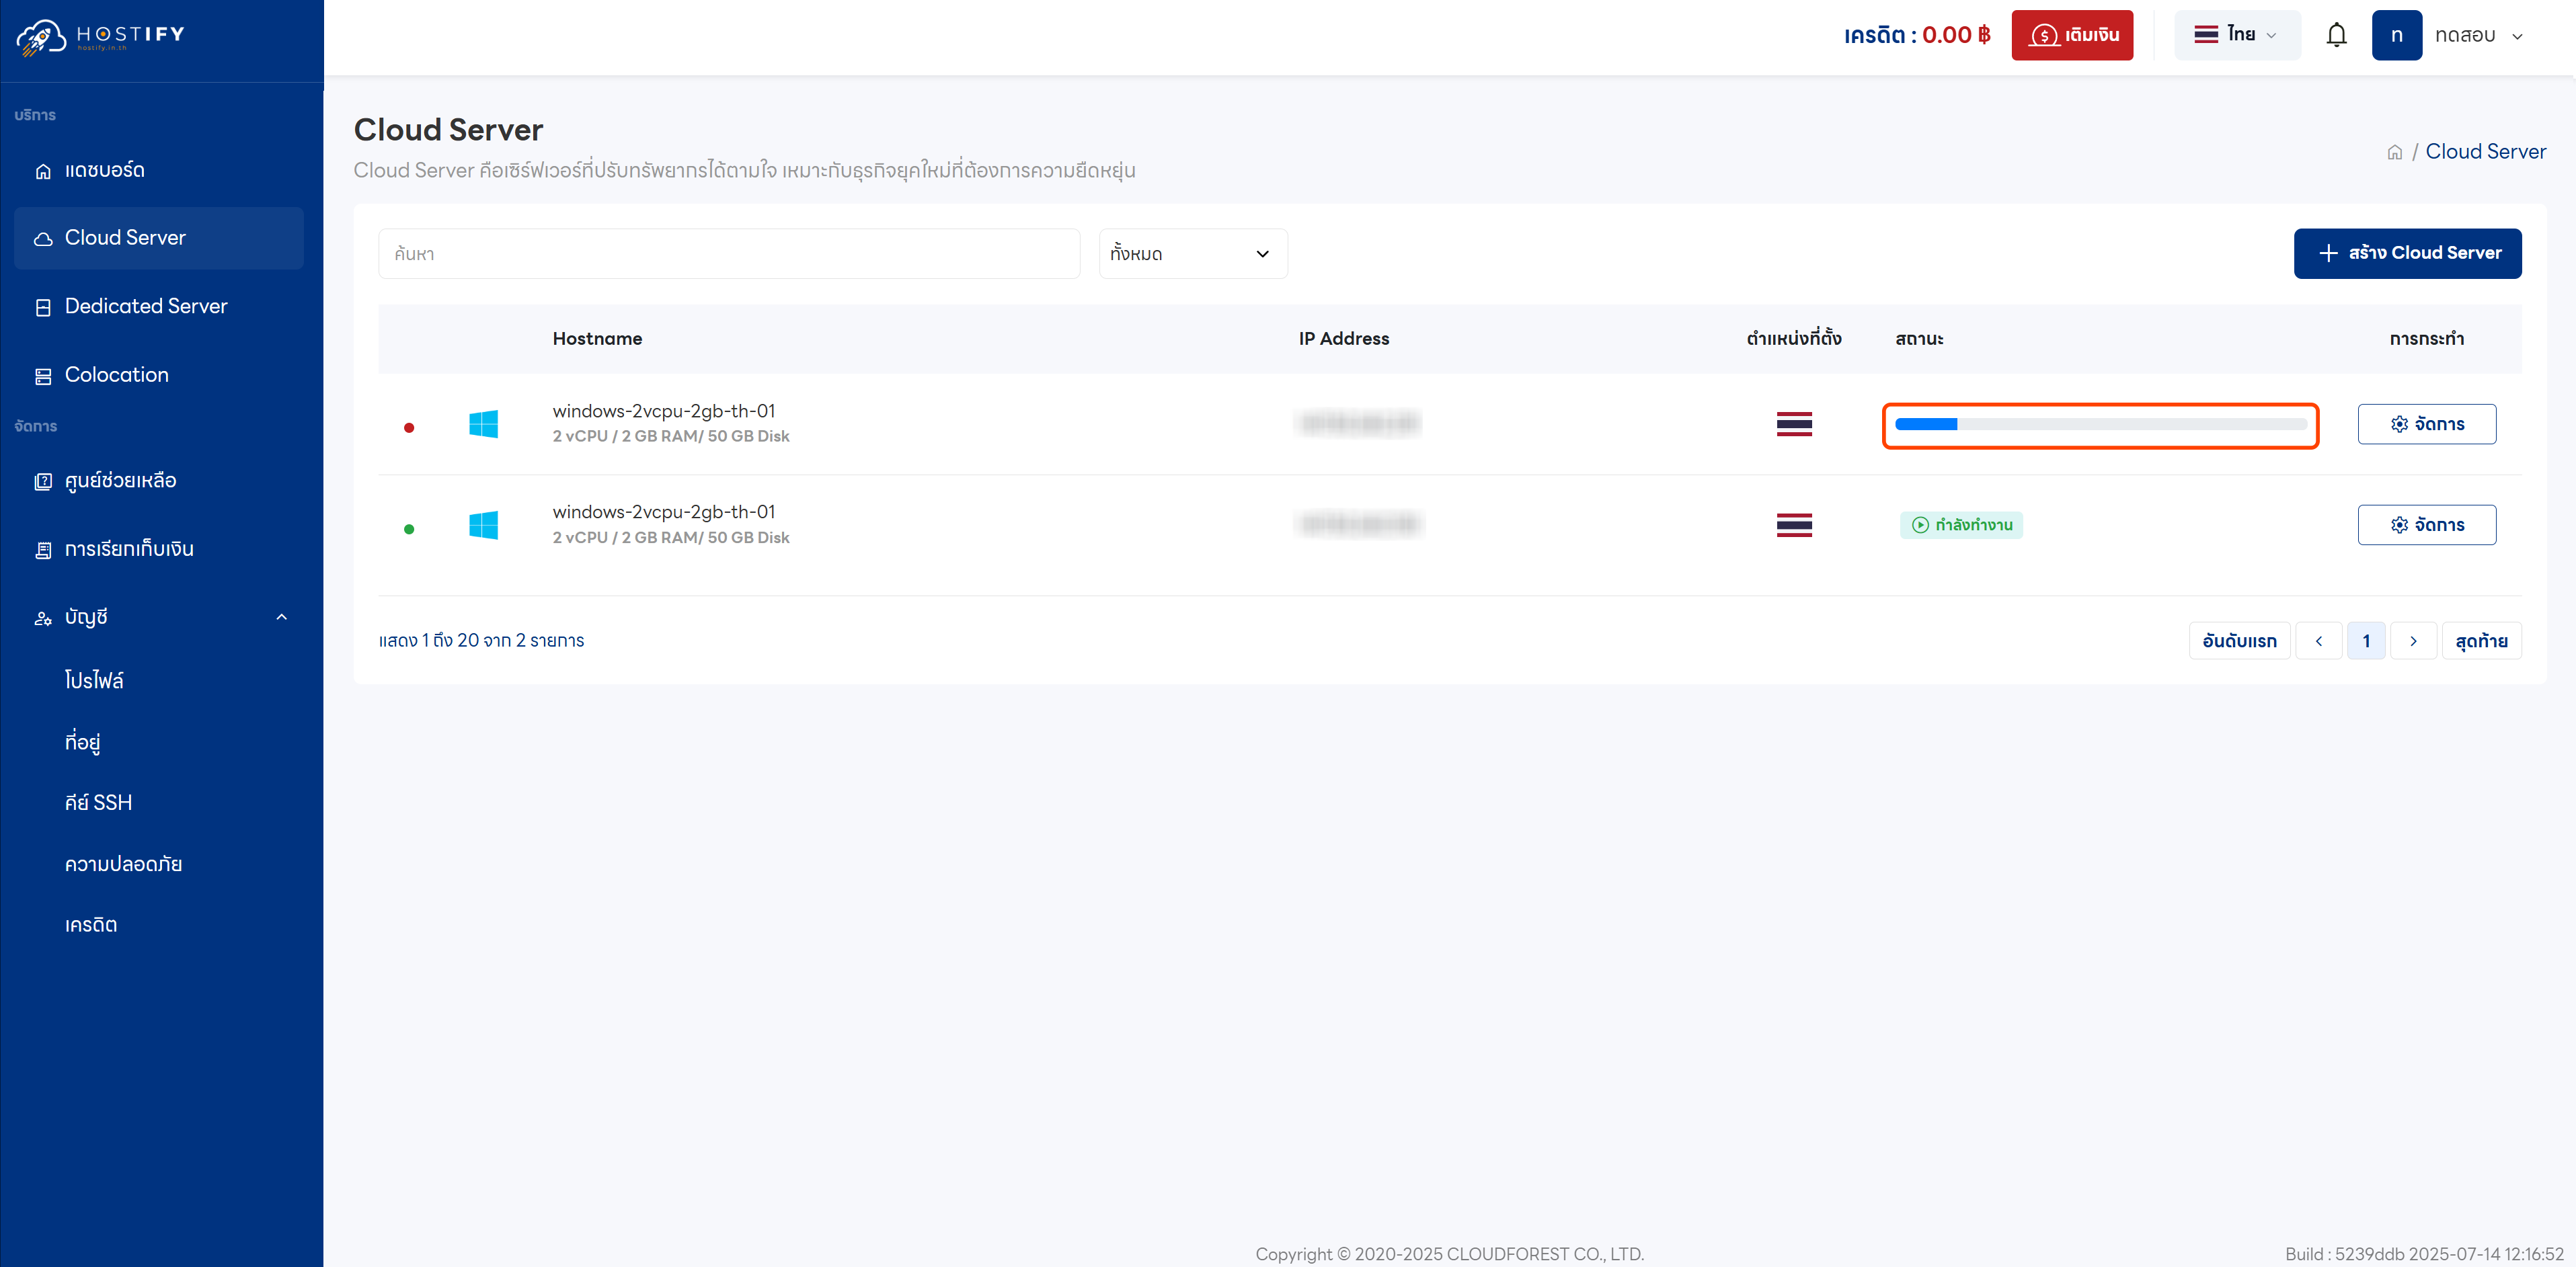
Section titled “Step 4: Wait for Deployment”Wait 1–5 minutes for the system to finish creating the Cloud Server.
Step 5: Manage the Server
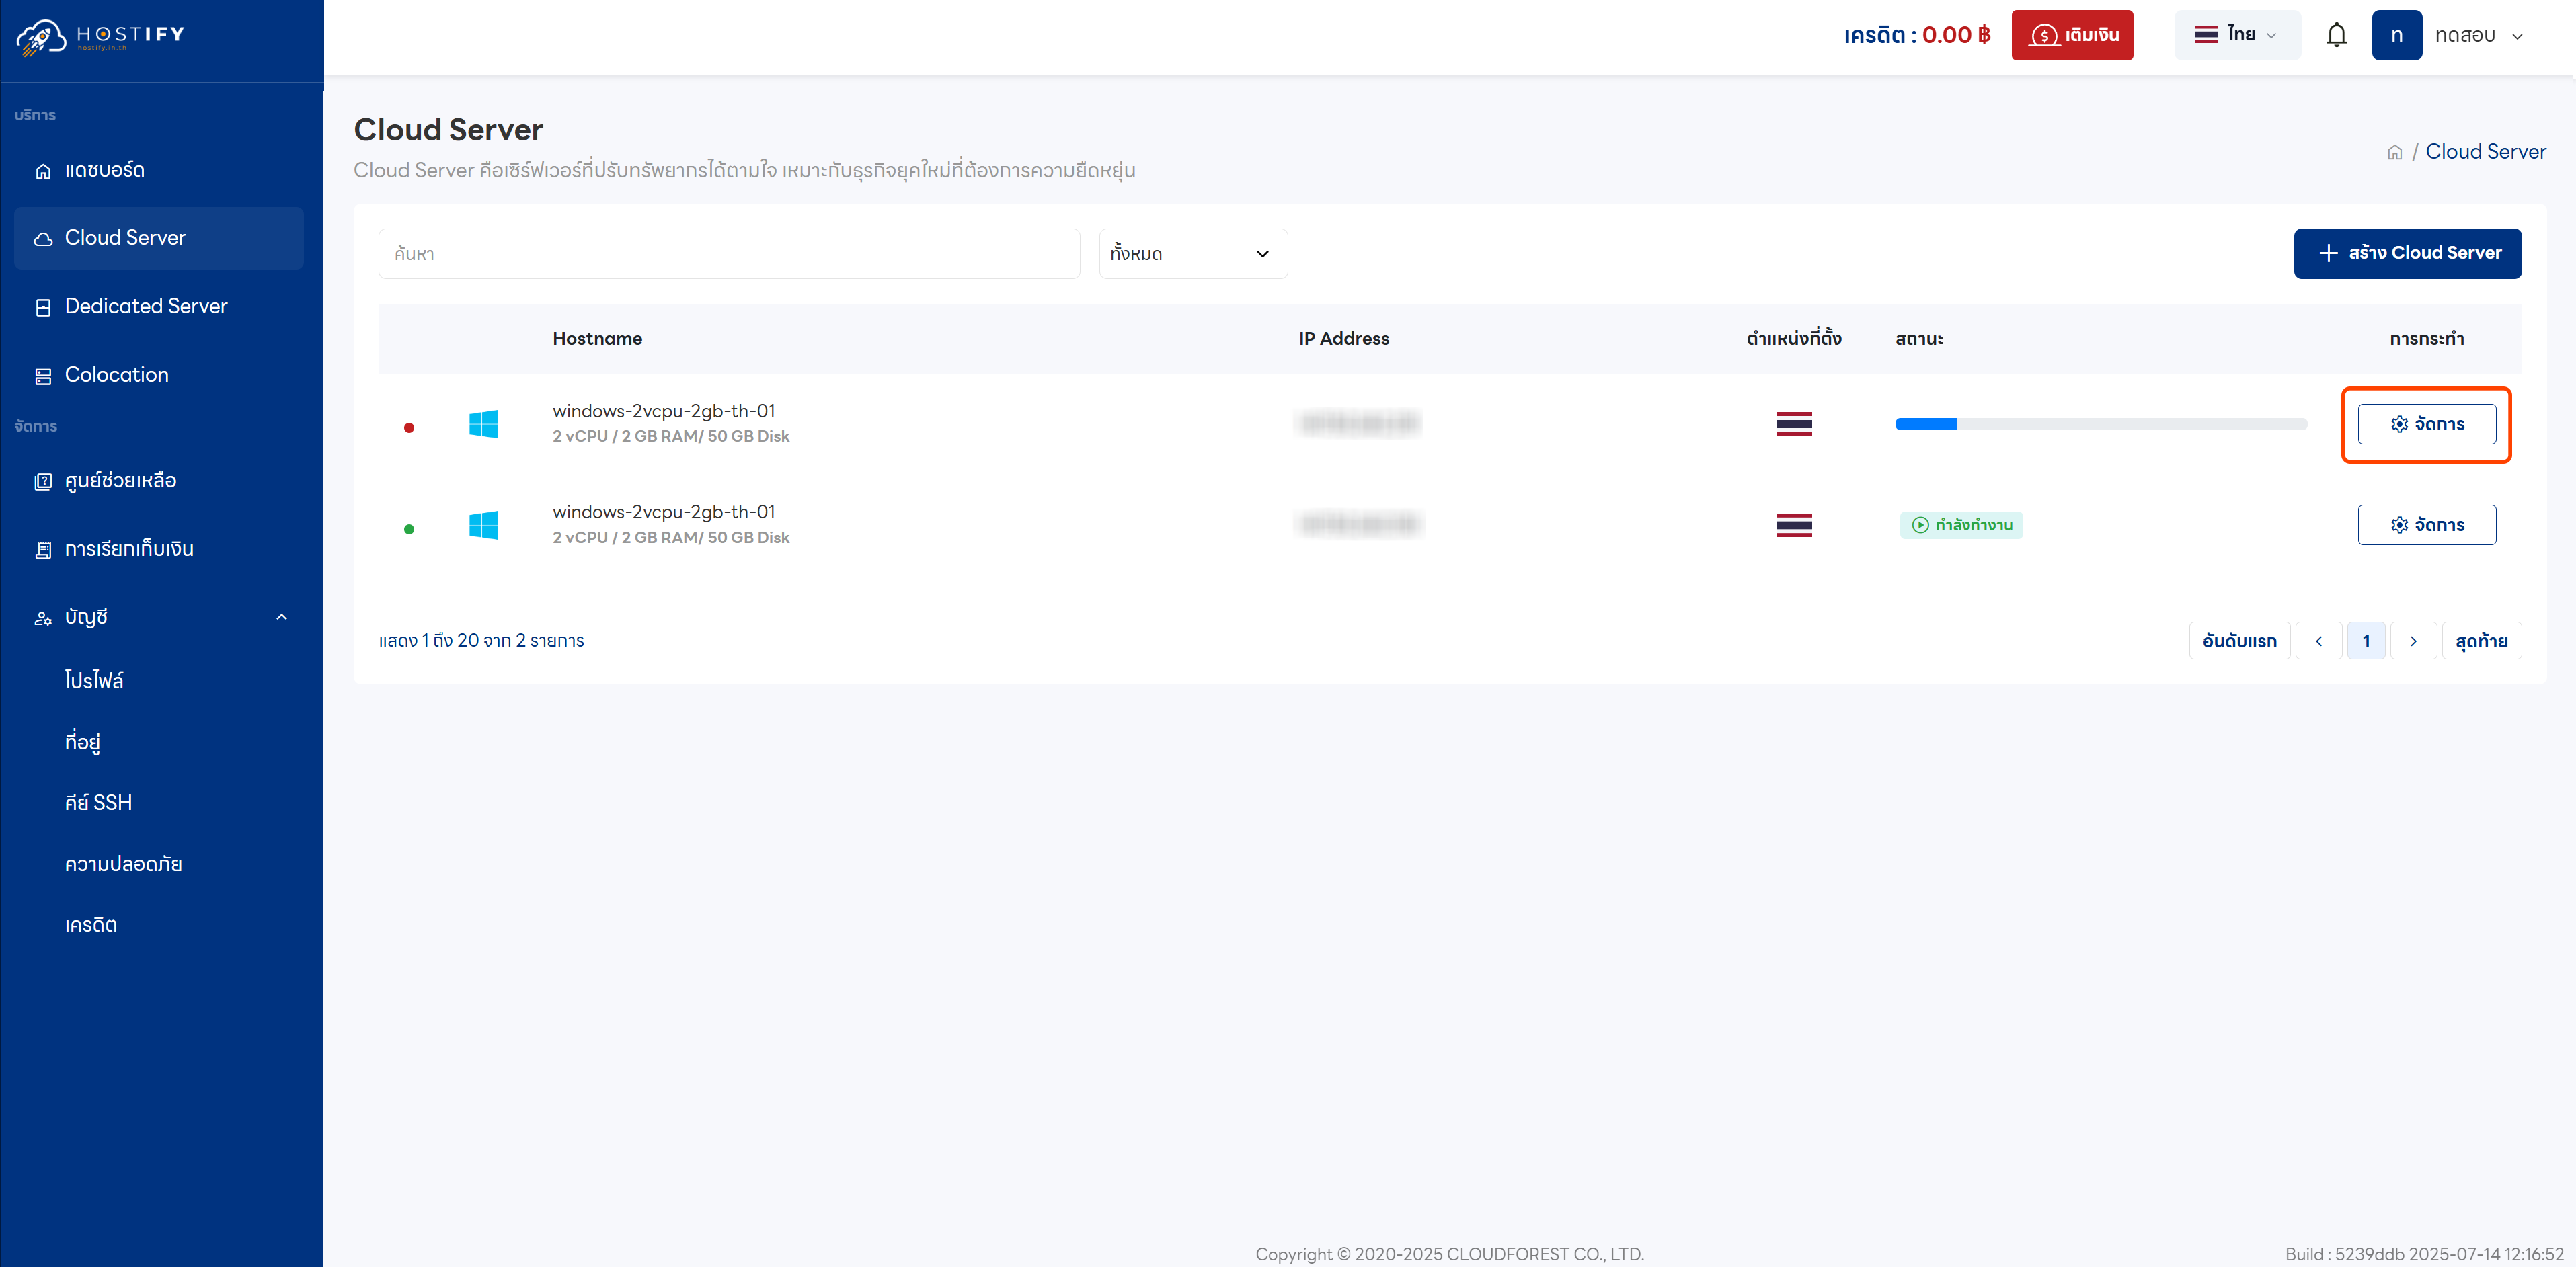
Section titled “Step 5: Manage the Server”Click “Manage” to access the newly created server.

Step 6: Dashboard
Section titled “Step 6: Dashboard”The Dashboard includes the following menus:
- Overview: Basic server information
- Usage Data: Resource usage statistics
- Settings: Configuration options, including server deletion
- Backups: Backup management
- DDoS: Protection settings
- Activity Log: System activity records
Accessing the Server
Section titled “Accessing the Server”- Linux/Ubuntu: Connect via SSH in a terminal:
ssh root@(server-ip-address) - Windows Server: Use Remote Desktop